

Welcome to the Stampin’ Pretty Pals’ Blog Hop! This month, the theme is Fantastic Fun Folds and 3D Projects. We really hope that you enjoy and will be inspired by them! As you hop from blog to blog, don’t forget to leave comments because we love hearing from you. You will find the lineup at the end of my post to help you “hop” along from Pal to Pal.
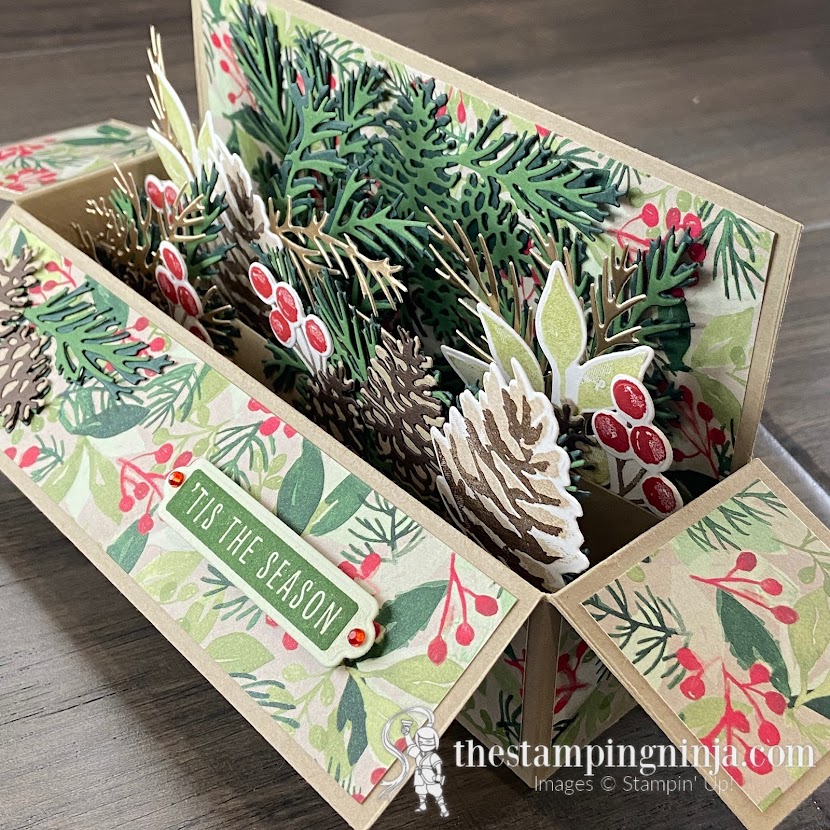
This fantastic fun fold is a Slimline, pop up box made with the Painted Christmas suite. It’s a gorgeous suite and this card highlights it very well.

Here is a picture of the entire suite. It can be found on pages 16-19 of the July-December 2021 Mini Catalog.

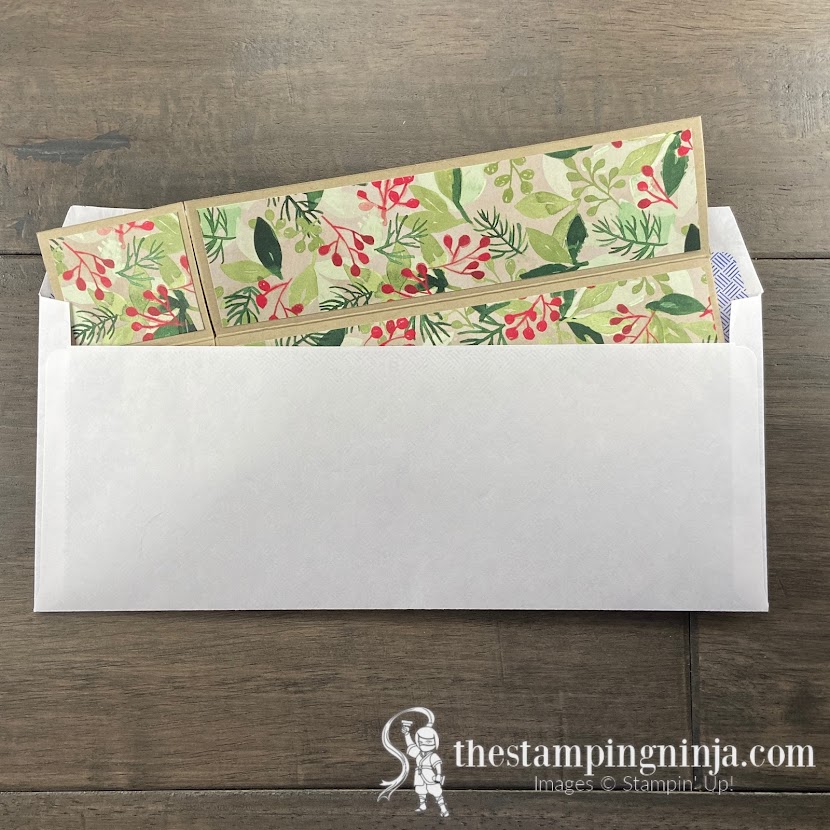
This card contains a lot of instructions, but has plenty of pictures. As a bonus, it also fits in a regular business envelope. So, without further ado, let’s make a fantastic fun fold!
To make the card
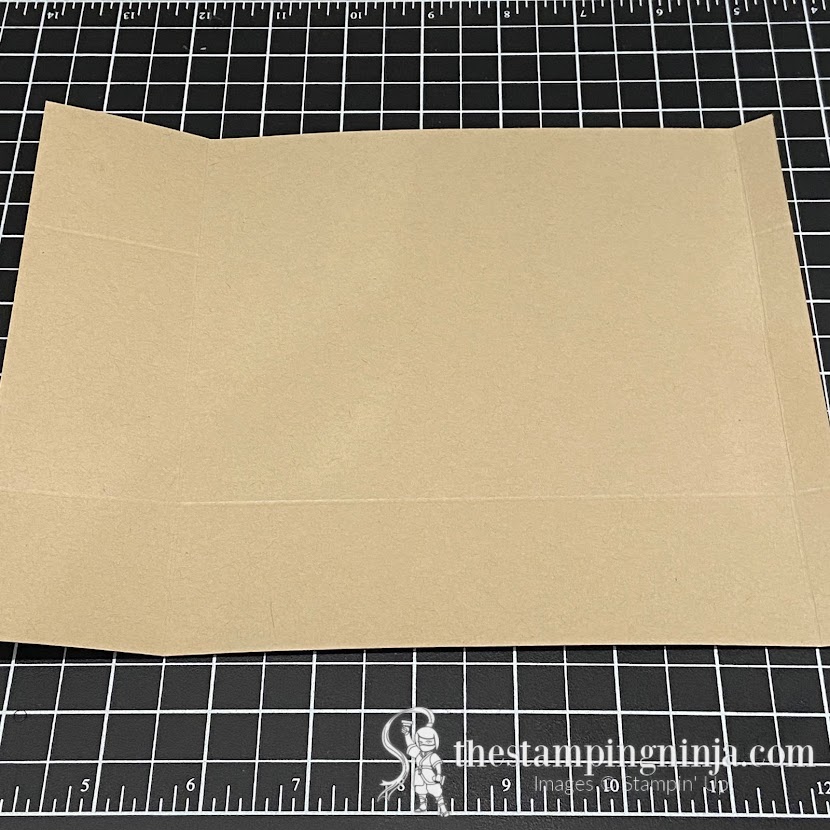
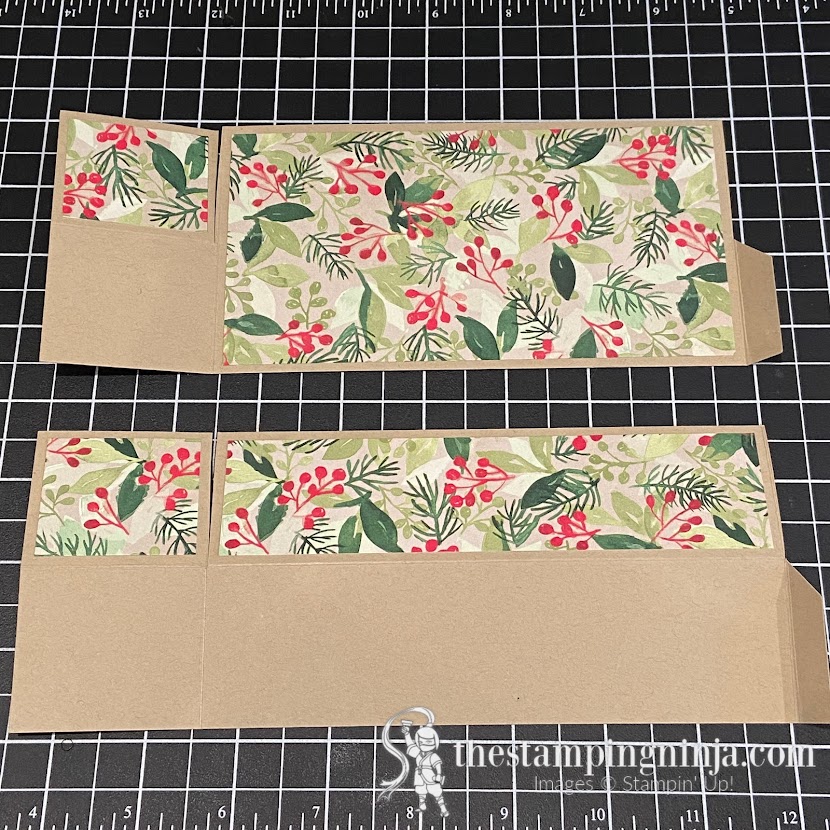
- Begin with a 7″ x 9″ piece of Crumb Cake cardstock. Score at 2″ and 8 1/2″ (widthwise).

- Turn your cardstock 90 degrees (so that it is lengthwise) and score at 1 3/4″. Then, score again at the 5 1/4″ mark from the top of the cardstock to the 2″ mark and the 8 1/2″ mark to the bottom of the cardstock. Be sure to not score in between the 2″ and 8 1/2″ mark.
- With your cardstock lengthwise, cut it in two so that each piece measures 3 1/2″ x 9″.

- Locate the 1/2″ fold on each piece of cardstock and cut diagonally from the edge to where the two score lines meet and trim the remaining piece off up to the top. Each piece should look like the photo below.
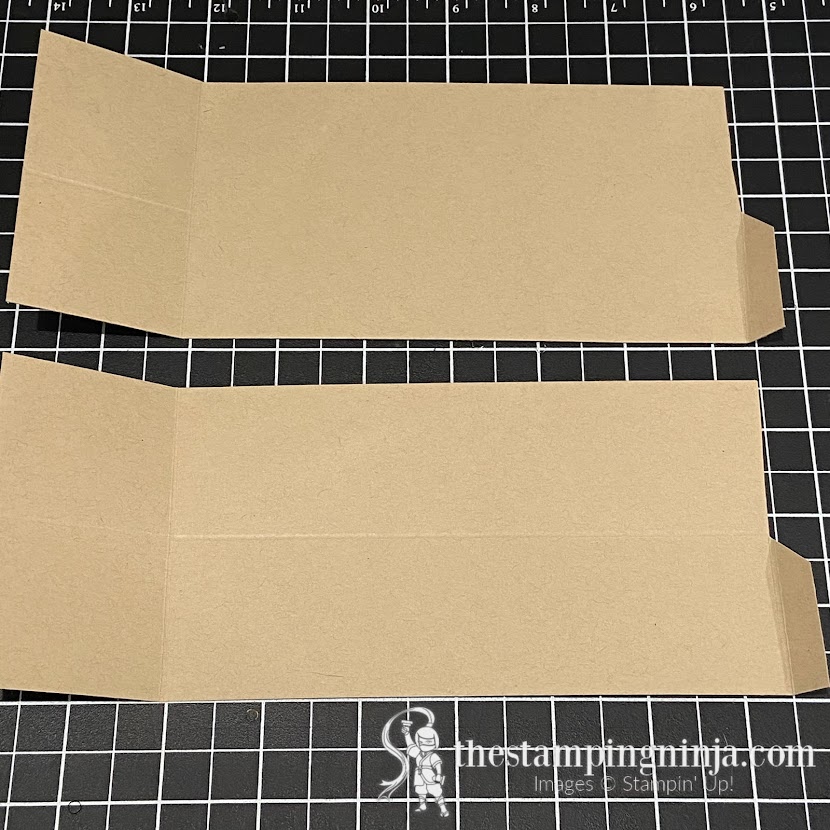
- On the other end of your cardstock, cut the 2″ fold line from the top of the cardstock to the horizontal 1 3/4″ fold line. Repeat on the other piece.
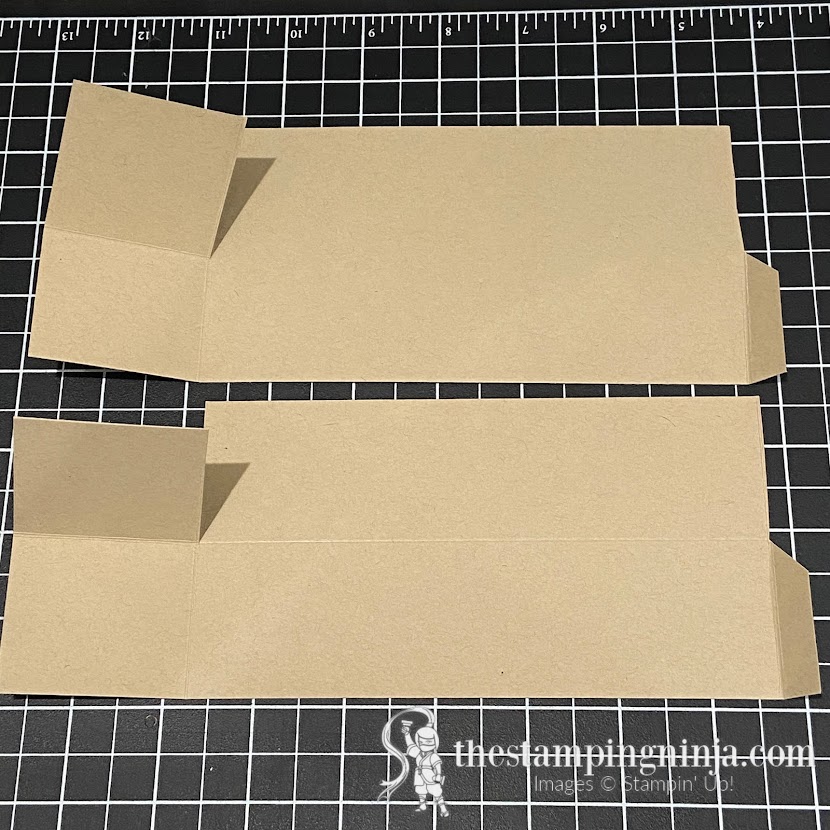
- Fold your score lines and burnish with your Bone Folder.
Decorate the fun fold before assembly
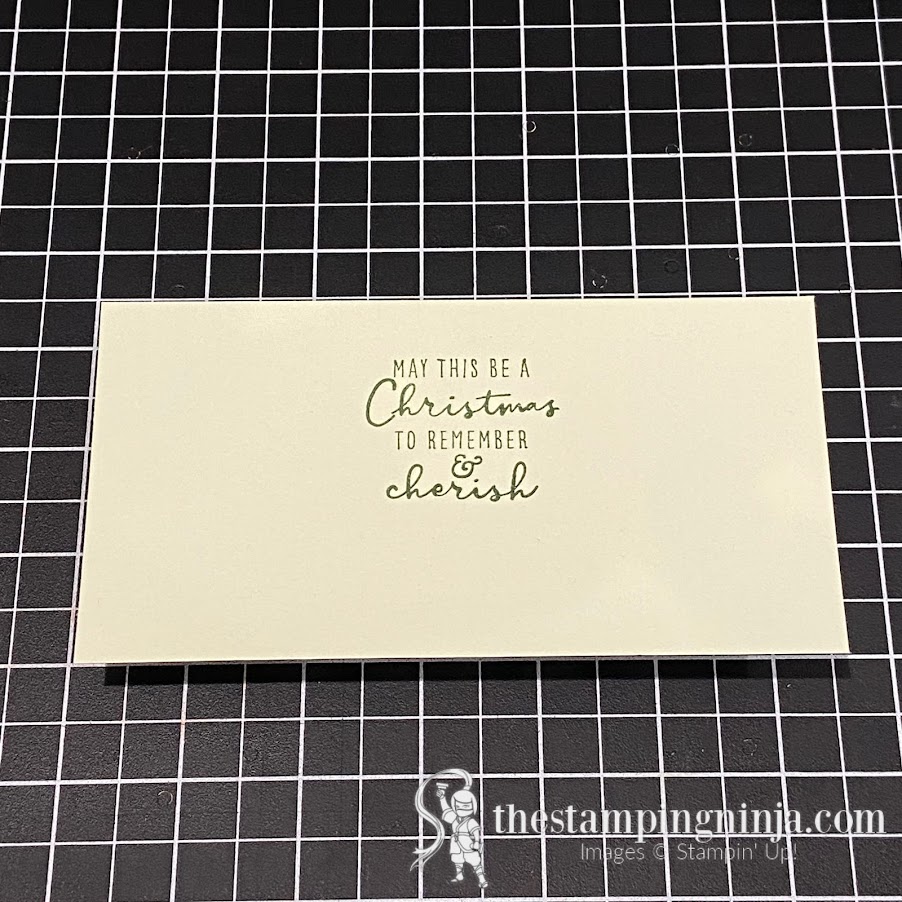
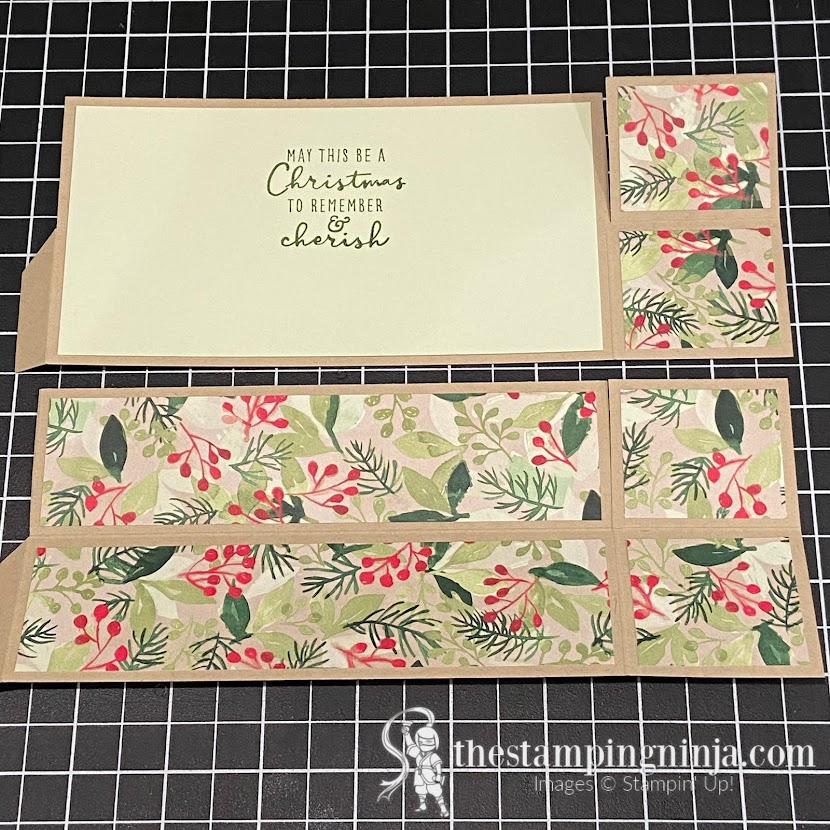
- Stamp your sentiment on a 3 1/4″ x 6 1/4″ piece of Soft Sea Foam cardstock using Garden Green ink. (hint – this piece is for the back of the box.)
- Cut a piece of the Painted Christmas designer series paper (DSP) to measure the following sizes: one large piece measuring 3 1/4″ x 6 1/4″, three medium pieces measuring 1 1/2″ x 6 1/4″, and six small pieces measuring 1 1/2″ x 1 3/4″.
- Lay the two Crumb Cake pieces in front of you with the cut tab to the right, and adhere the large piece, one medium piece, and two small pieces as shown below.
- Flip the two pieces over and adhere the Soft Sea Foam piece, two medium pieces, and the remaining four small pieces as shown below.
- Cut a piece of Crumb Cake cardstock to measure 2″ x 7 1/2″. Score each end at 1/2″ and cut the piece in two to measure 1″ x 7 1/2″.
- Apply Tear & Tape to the two tabs and the end pieces of each strip you just cut.
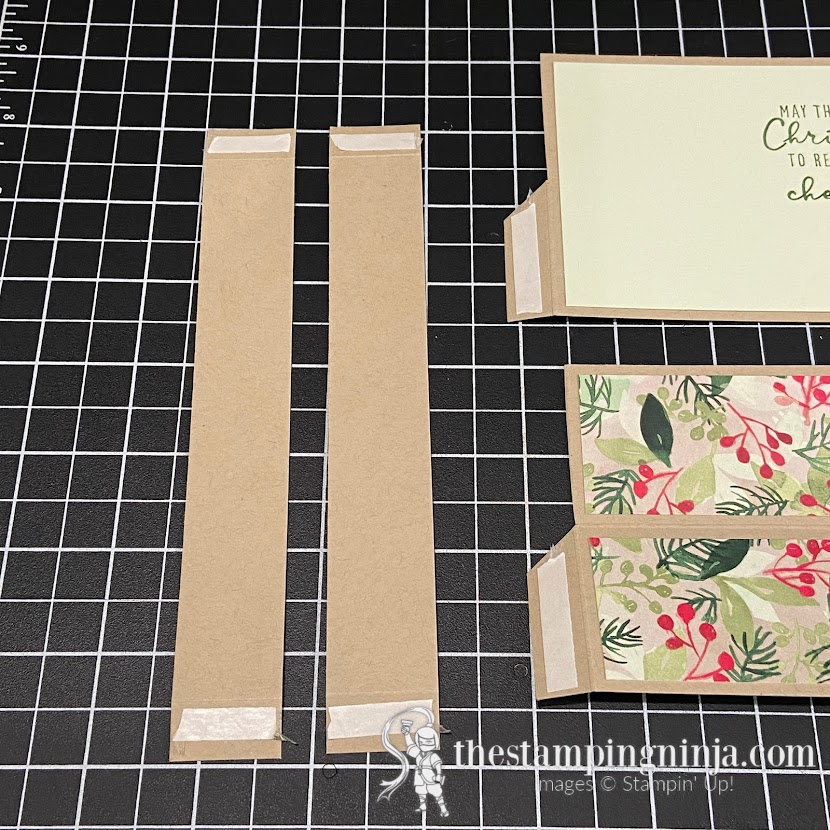
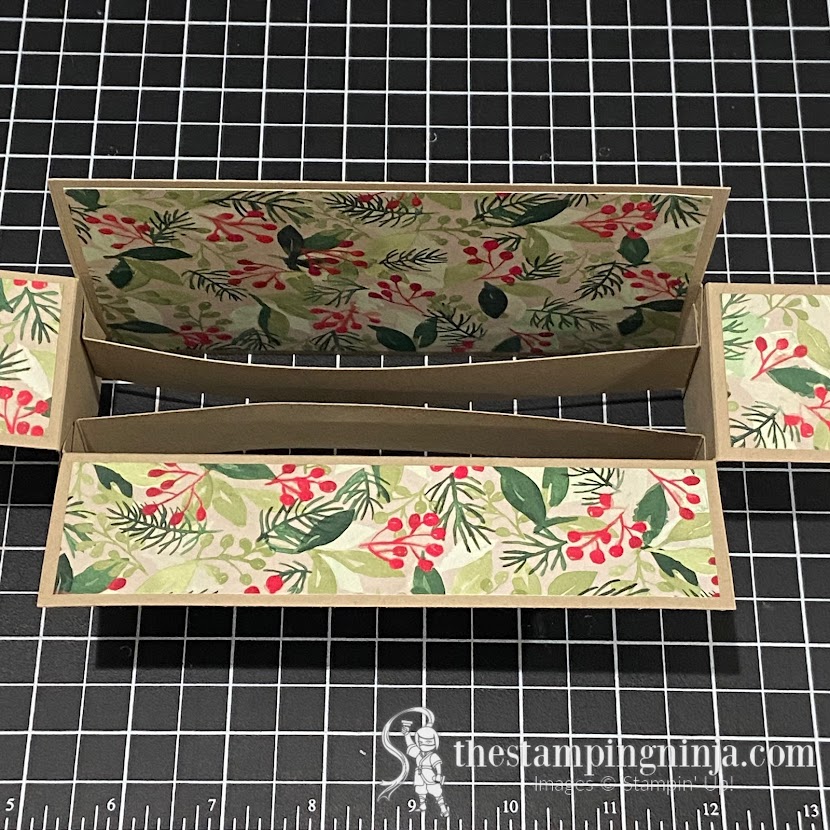
- Remove the paper from the two tabs and adhere the two large pieces together to form a box.
- Attach the two small Crumb Cake strips to the inside of the box as shown.

The inside details of the fantastic fun fold
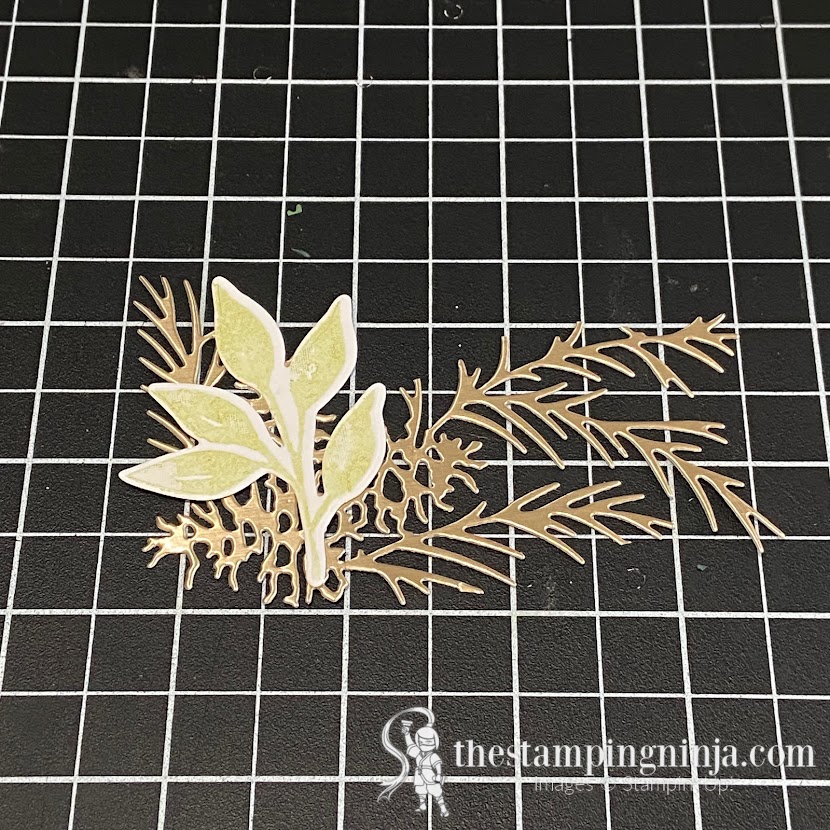
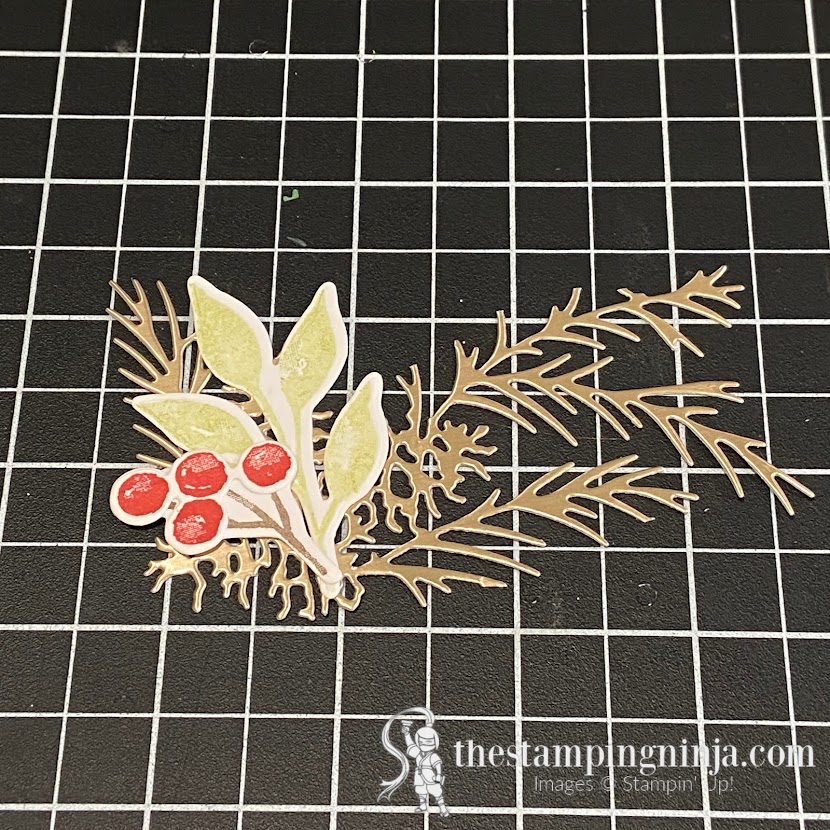
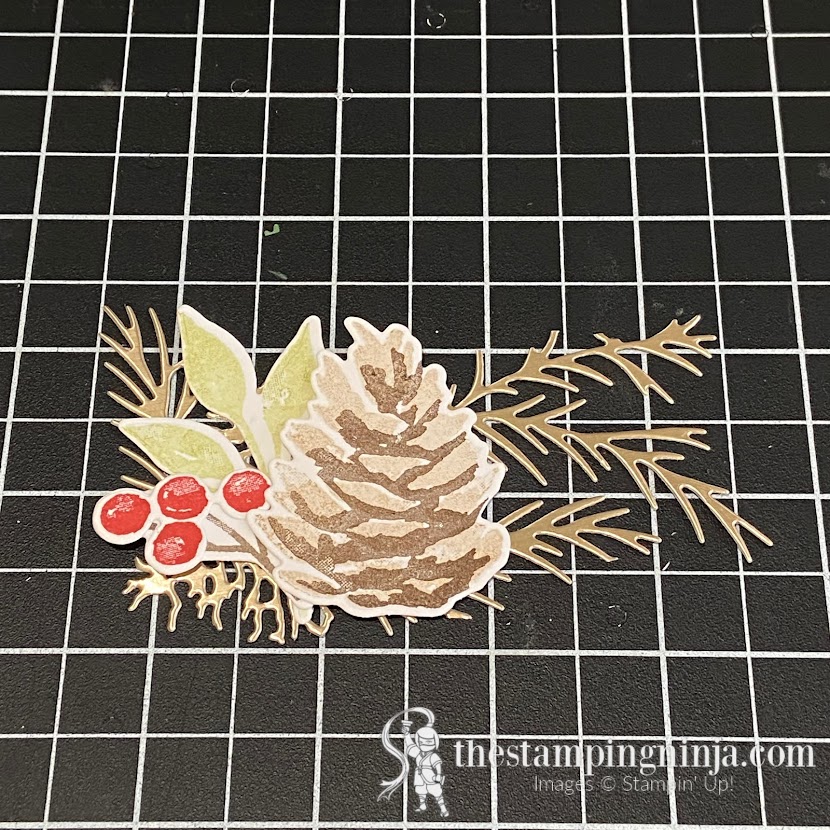
- On a piece of Basic White cardstock, stamp the following: two large pinecones in Crumb Cake (stamped off) and Early Espresso ink, two large leaf bunches in Pear Pizzazz (stamped off) ink, five berry twigs in Early Espresso, and five bunches of berries in Real Red ink. (stamp off means to ink up your stamp, stamp on a piece of scrap paper, then without re-inking your stamp, stamp your image where desired)
- Crop out the images you just stamped with the Seasonal Label dies using your Stampin’ Cut & Emboss machine.
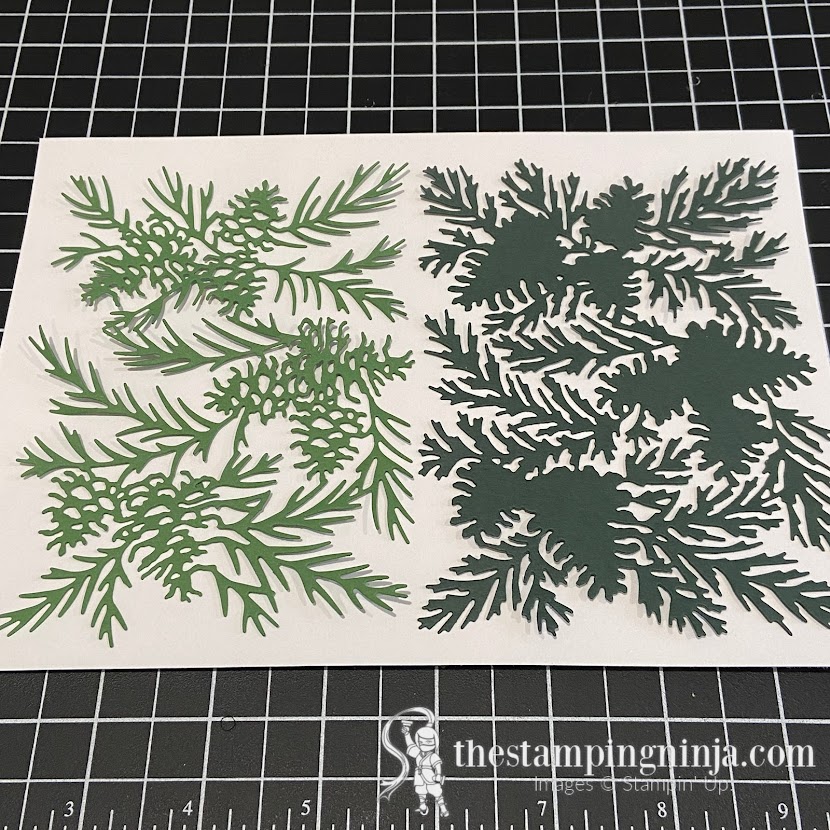
- With your machine again, crop out the following with the Christmas Pinecone dies: two pieces of Evening Evergreen cardstock with the large background, two pieces of Garden Green cardstock and a piece of gold Brushed Metallic cardstock with the large, detailed die, two large and five small background pinecones in Crumb Cake cardstock, and two large and five small detailed pinecones in Early Espresso cardstock.
- Adhere the large Evening Evergreen pieces with the Garden Green pieces and the seven pinecones together with Multipurpose Liquid Glue, using the Silicone Craft Sheet method. Do this by laying the pieces upside down on your Silicone Craft Sheet, add some glue to the sheet (up in the corner and out of the way), dab a sponge into the glue, and lightly tap some glue on to the pieces. (Hint- this will ensure that your small pieces have glue on them, and you will not have to worry about globs of glue oozing out from your layers.) Once the glue is dry on your sheet, simply rub it off with your hand.
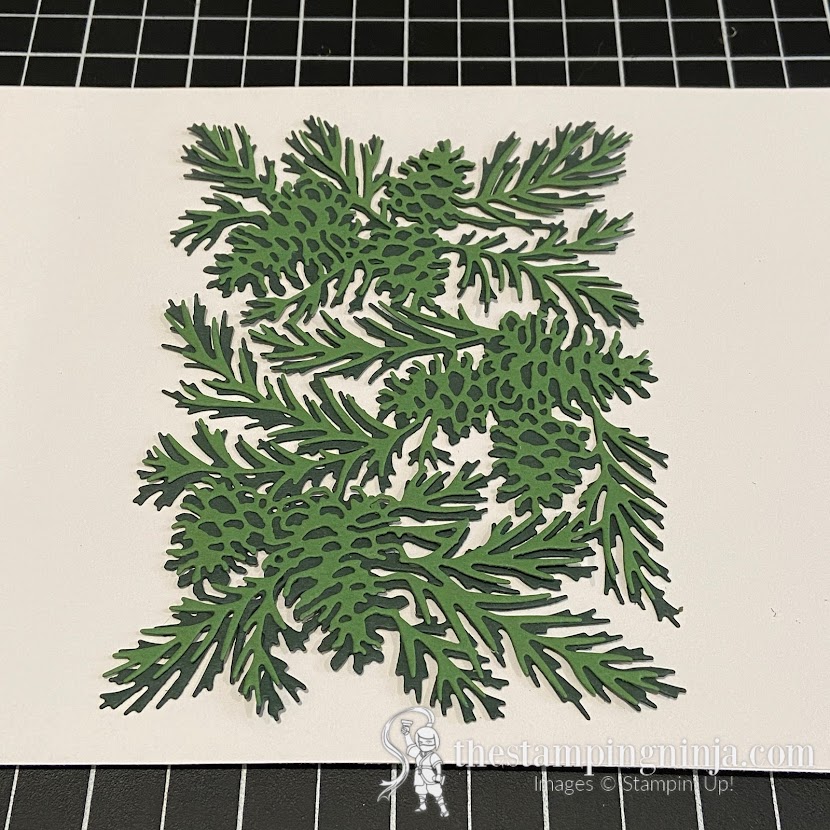
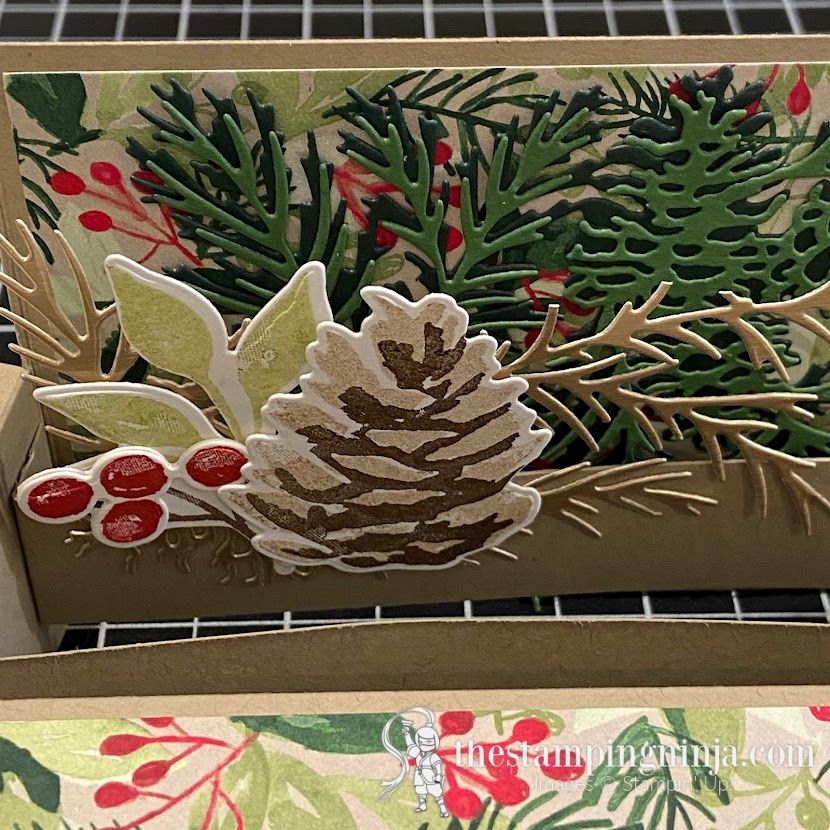
- Attach one of the layered green pieces to the inside back of the box using Multipurpose Liquid Glue. (hint- line the piece up to the top of the card and trim the bottom off with your Paper Snips. You don’t want your foliage sticking up above the top of the card.)
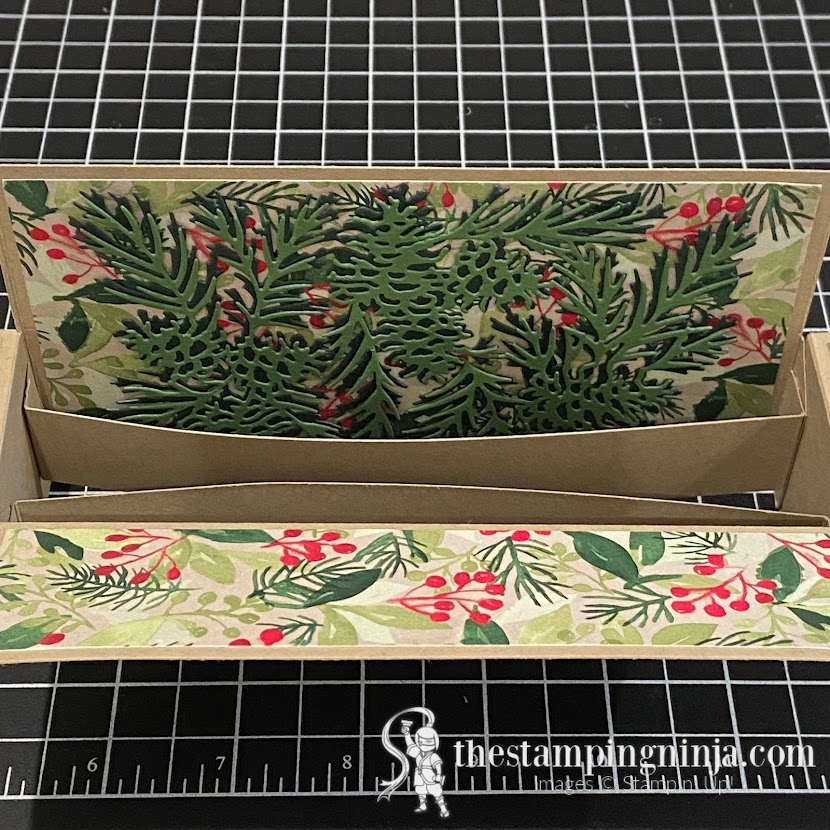
- Cut the other layered green background pieces and the gold background piece in three using your Paper Snips.
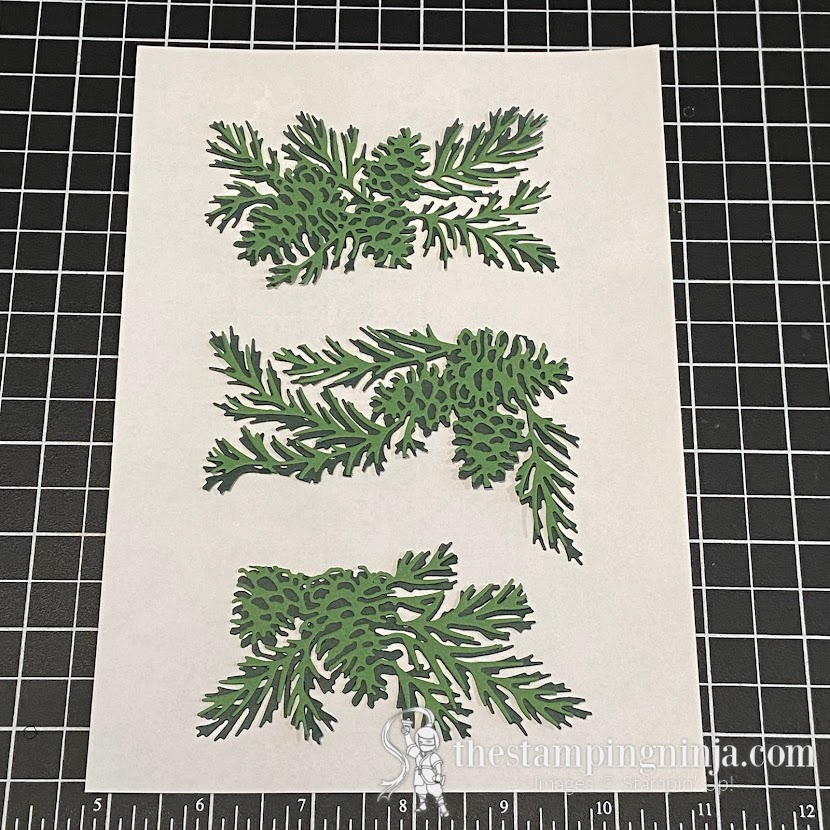
- Layer and build small pieces to fit inside your box and attach them to the Crumb Cake strips inside the box using Glue Dots. For example, here is the first layer that I built. Continue building and adhering your layered pieces until your box is full and lush.
The final details
- Adhere a small piece of greenery and two pinecones to the front, and a bunch of berries with a small pinecone to the back, using Multipurpose Liquid Glue.
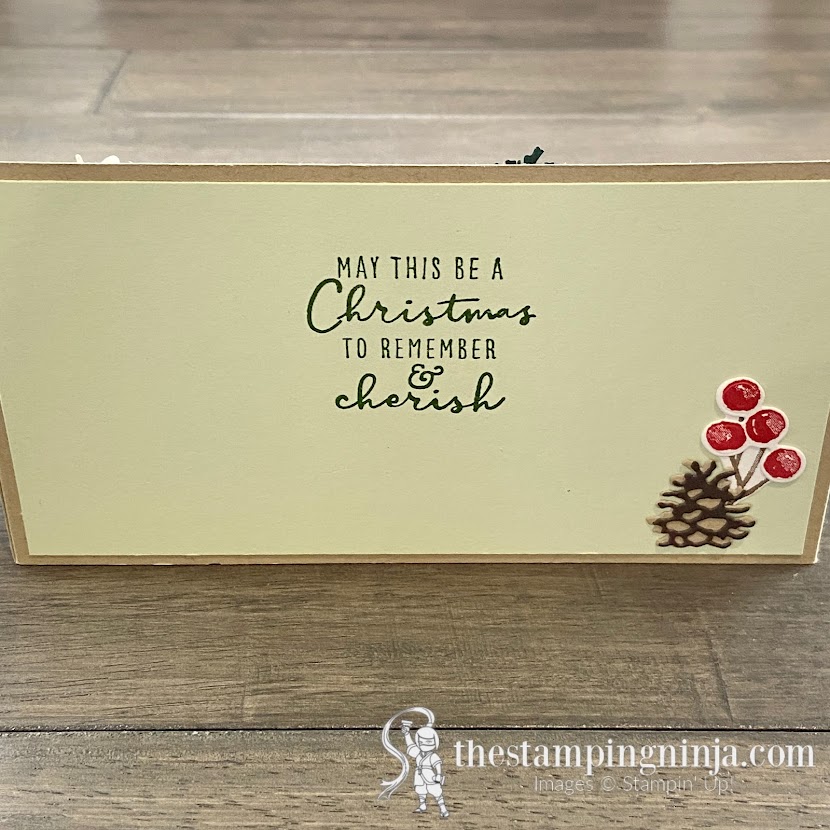
- Stamp your small sentiment on a piece of Soft Sea Foam cardstock using Garden Green ink. (hint – I used my Stamparatus so that the ink was well saturated and even.)
- Crop the sentiment out with the Seasonal Labels dies and adhere to the card using Stampin’ Dimensionals.
- Attach two Red Rhinestone Basic Jewels as shown.
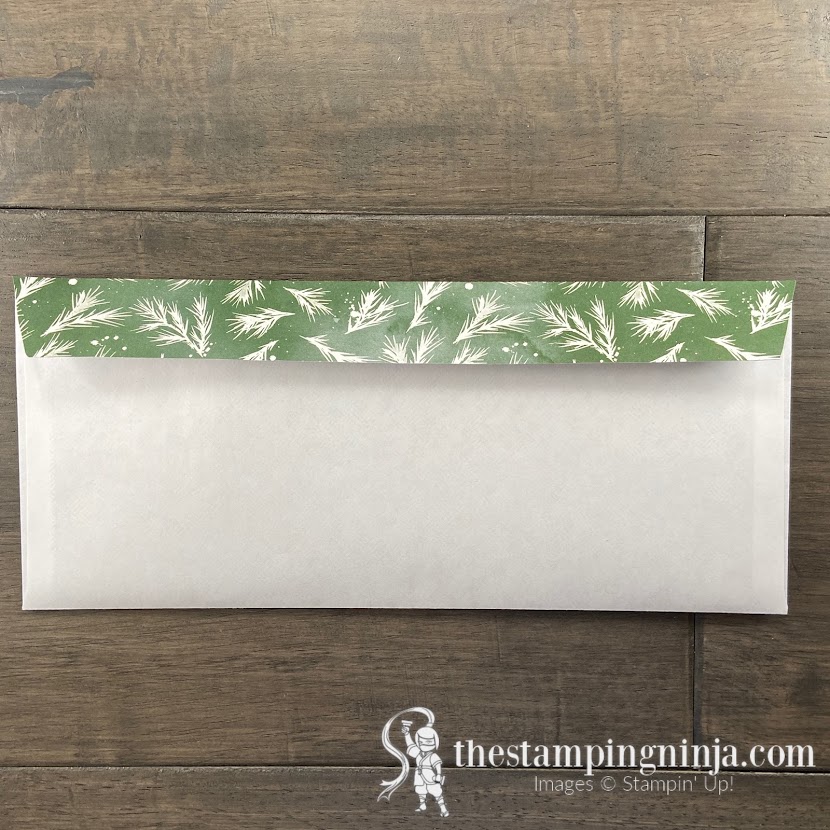
- FOR AN ADDED TOUCH: Add a piece of matching Painted Christmas designer series paper (DSP) to a regular business envelope flap. Glue a 1 1/2″ x 10″ piece to the outside of the envelope and trim off the excess with your Paper Snips.
A complete PDF tutorial for this fantastic fun fold can be found by clicking on the button below.
Before you go
More inspiration awaits, so use the lineup below to visit the rest of the Design Team. The Pals are excited to show you what they’ve created! Then, please mark your calendars for our next blog hop on November 10th. Our theme will be “Home for the Holidays” when our Design Team creates a project to celebrate the upcoming holidays. Until then, have fun in your craft space.
Stampin’ Pretty Pals Blog Hop
- Mary Fish at Stampin’ Pretty
- Pamela Sadler at Stampin Pink Rose
- Michelle Quinno at Shell Stamps
- Stesha Bloodhart at Stampin’ Hoot!
- Melissa Seplowitz at The Stamping Ninja
- Windy Ellard at Windy’s Wonderful Creations
- Jackie Beers at Blue Line Stamping
- Su Mohr at Aromas And Art
- Jill Loveland at Simple Stamping
- Tricia Chuba at ButterDish Designs
- Ann Murray at Murray Stamps INK
- Beth McCullough at Stamping Mom
- Diana Carr at Secret Life of Paper
- Jennifer Roque at Stamp Camp with Jen
- Karen Hallam at Karen’s Stamping Habit
- Peggy Noe at Pretty Paper Cards
- Rae Harper Burnet at Wild West Paper Arts
- Deb Walker at Deb Stamps Life
- Debbie Mageed at Secrets to Stamping
- Lisa Ann Bernard at Queen B Creations
- Lori Webb at Clever Copies
- Lori Pinto at LollyPop Paper and Ink
- Mary Hanson at Up North Stampin’
- Amanda Howard at Papercrafting With Amanda
I would love to hear from you. Please let me know what you think of my slimline Fantastic Fun Fold for the Pals Blog Hop.

I love the card! Thanks for the tutorial
Thank you Michele! Happy to share 🙂
This really is a wow! Beautiful!
Thank you so much Pat!
Love, love, love!!!!! Thank you so very much for the awesome pdf directions!!
Thank you Katrina! You’re very welcome for the instructions.
A slim-line pop-up card. . .Fantastic! Thank you for hopping with us this month. 🙂
Thank you so much Rae! 🙂
Wow, Melissa, I have made many a card-in-a-box cards before, but absolutely love that you made one with slimline dimensions. I will definitely want to try yours soon. Great project!! Thank you for joining the Blog Hop this month!
Thank you Debbie! I thought I would try to re-invent the wheel a little. Always happy to hop along!!
Wow, there are LOTS of STEPS but the card is ama! I ca wa to TRY it.
Thank you Amanda! Have fun with it!
all i can say is, “That’s an amazing card.” this would be a one-of-a-kind if i decided to make it for a very special person. thanks for doing the pdf. i’ll save it for a future season, using other dsp, stamp sets and dies.
Thank you Peggy! It is a one-of-a-kind, but a lot of fun to make. Let me know if you need any help along the way. 🙂
Melissa, absolutely gorgeous pop up card!
Thank you so much Tricia!
This is gorgeous melissa! I will have to make one just for decoration in my house this year! Thanks for the inspiration!
Thank you Windy! I’m glad I could inspire you and I think one would look great as decoration in your home. 🙂
Melissa, a box full of gorgeousness! Love it!
Thank you so much Su!!
Such a cool project — I love it. What a treat to receive in the mail. And your instructions are so detailed! Thanks for sharing!
Thank you Mary! I’m not sure who the recipient will be yet, but thankful that it does fit in an envelope.
LOVE, LOVE, LOVE this Melissa! So much wonderful work here with so much texture to enjoy! Great to see how you put your own stamp on our fun folds hop!
Thank you so much Deb! It was a lot of fun to create. 🙂
You rocked the pop up box. It is beautiful.
Thank you so much Ann!!
absolutely gorgeous!
Thank you Diana!
Wow, Melissa, this is amazing!!
Thank you so much for the kind words Michelle!?
Great project! It really shows off the DSP and Dies! Very good tutorial that is easy to follow. Thank you for another new idea!
Thank you Jackie! I had a lot of fun with this one.
Gorgeous project and brilliant tutorial! Thanks for the amazing inspiration.
Thank you so much Linda! Happy to share 🙂