
Today is the return of Hey Chic! This stamp set was an all-time favorite back in 2017, so Stampin’ Up! has decided to bring it back.

I have always been fond of it, so I am glad to see it return. This chick, in particular, has always brought a smile to my face.
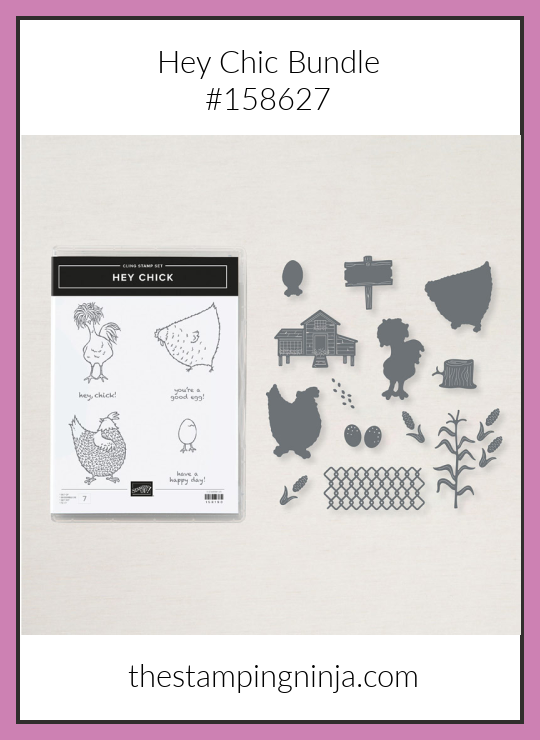
The stamp set includes three fabulous chickens and one adorable egg. And, wait for it…, they now have matching dies!! How great is this? I really enjoy having matching dies to my stamp sets and this one does not disappoint.
The dies include, not only the chickens, but a complete farm set. Everything you need to complete your card in relation to the chickens.
Yes, it coordinates!
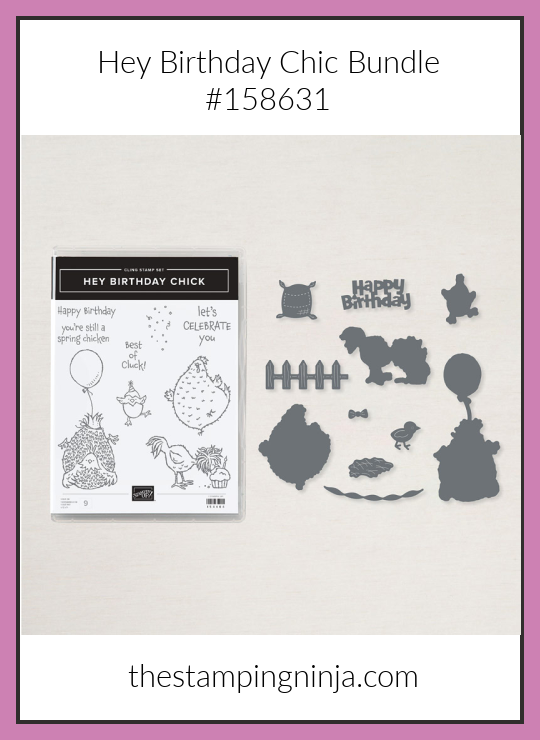
The Hey Chic set is designed to coordinate with the Hey Birthday Chic stamp. This set is in the newly released January-June 2021 Mini Catalog and couldn’t be cuter. It contains the same chickens and egg in a whimsical birthday theme.
This set was originally a stand-alone, but matching dies are now available for it too! No more fussy-cutting these chicks.
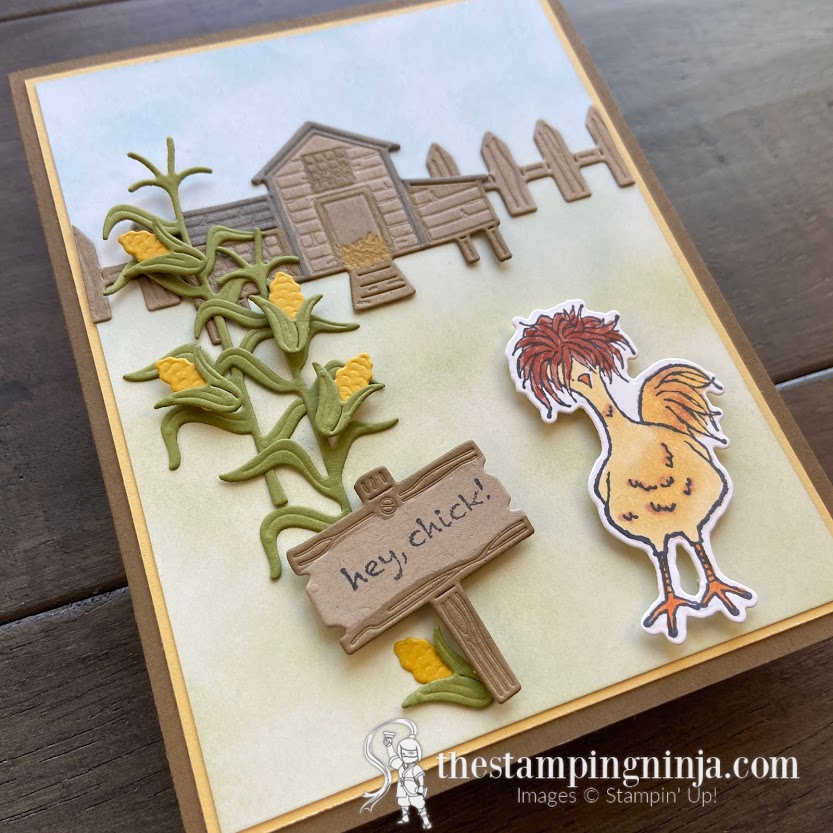
Now that you know about the new chick items, here is how to make the cute card.
To make the card
- Begin with a 5 1/2″ x 8 1/2″ piece of Soft Suede card stock, score and fold at 4 1/4″ to form your card base.
- Adhere a 4″ x 5 1/4″ piece of So Saffron card stock to the card base using Stampin’ SEAL.
- Color a 3 7/8″ x 5 1/8″ piece of Basic White card stock with Balmy Blue and Old Olive ink using your Blending Brushes. (the sky should be 1/3 and the grass 2/3)
- Stamp the chicken on a piece of Basic White card stock using Tuxedo Memento black ink and color with Cajun Craze, Pumpkin Pie, and So Saffron Stampin’ Blends.
- Using your Stampin’ Cut & Emboss machine crop out the following: the chicken, a sign and hen house in Crumb Cake card stock, two corn stalks in Old Olive card stock, five ears of corn in Crushed Curry and Old Olive card stock using the Hey Chick dies and two pieces of fence in Crumb Cake card stock using the Birthday Chick dies.
- Color the fence with your light Crumb Cake Stampin’ Blend, the sign with the light Soft Suede Stampin’ Blend, and the hen house with light Crumb Cake, dark Daffodil Delight, light Soft Suede, and light Smoky Slate Stampin’ Blends.
- Adhere the fence to the card where the sky and grass come together, trim the ends of the fence to the edge of the paper, and adhere to the card using Stampin’ SEAL.
- Adhere the hen house to the card, overlapping the fence, and adhere the two corn stalks on top of it.
- Attach the corn husks to the corn cobs using a Glue Dot, adhere one towards the bottom of the card with Stampin’ SEAL and attach the other four to the corn stalks using a Mini Stampin’ Dimensional.
- Stamp the sentiment on to the sign using Tuxedo Memento black ink and adhere to the card using Stampin’ Dimensionals.
- Adhere the chicken to the card using Stampin’ Dimensionals as shown.
I would love to hear from you. Please let me know what you think of the return of Hey Chic!

If you would like to purchase the supplies used to make the return of Hey Chic card, you can click here or any of the photos below. When ordering, be sure to enter my monthly host code to take advantage of the Ninja Loyalty Rewards Program.

If you enjoyed this post, please be sure to…
- Sign up for my Newsletter and receive a FREE exclusive PDF Tutorial.
- Sign up to get blog posts delivered to your in box.
- Use this Month’s Host Code on orders under $150 to earn your way to a FREE $50 shopping spree on me using the Ninja Rewards Loyalty Program.
- Shop and save the CLEARANCE RACK and PRODUCT BUNDLES.
- View My Gallery for more great inspiration.
- Follow me on PINTEREST, FACEBOOK, and INSTAGRAM.
Just love this Hey Chick card. Just found your website and saw this card. My son and daughter in law raise chickens and they would get a good laugh from this card. Have all of the chick stamp sets and dies and just love them.
Thank you so much Maureen! The chicks are definitely a lot of fun, I bet they would get a good laugh. 🙂
Was wondering when is the Hey chick bundle going to be available to purchase.
The Hey Chic bundle retired last year, so the only way to purchase it will be to buy it from someone selling theirs.
Love this card. Am totally going to case it if that is ok!
Thank you! I would be honored to have you case it. 🙂
I love your card. how did you do that straw in the hen house door. never noticed the texture there on the die. Though maybe there is. thank you for sharing.
Thank you Kelly! The straw is part of the texture on the die. I just highlighted it more by coloring it with my Daffodil Delight Stampin’ Blend. 🙂
Such a cute card! Thanks for sharing. I’m excite to use my Hey Chick bundles!
Thank you Tracy! I’m happy to share. 🙂
So cute, and thank you for the clear instructions.
Thank you! You’re so very welcome for the instructions.
This is such a fun SCENE, Melissa!!
Thank you Michelle! 🙂